Monday, August 10, 2015

wood slice chalkboard


I know that you've seen these around... those wood slice chalkboards. I've seen them for sale about everywhere. Did you know that they're super easy to make too? I made one in the picture below!


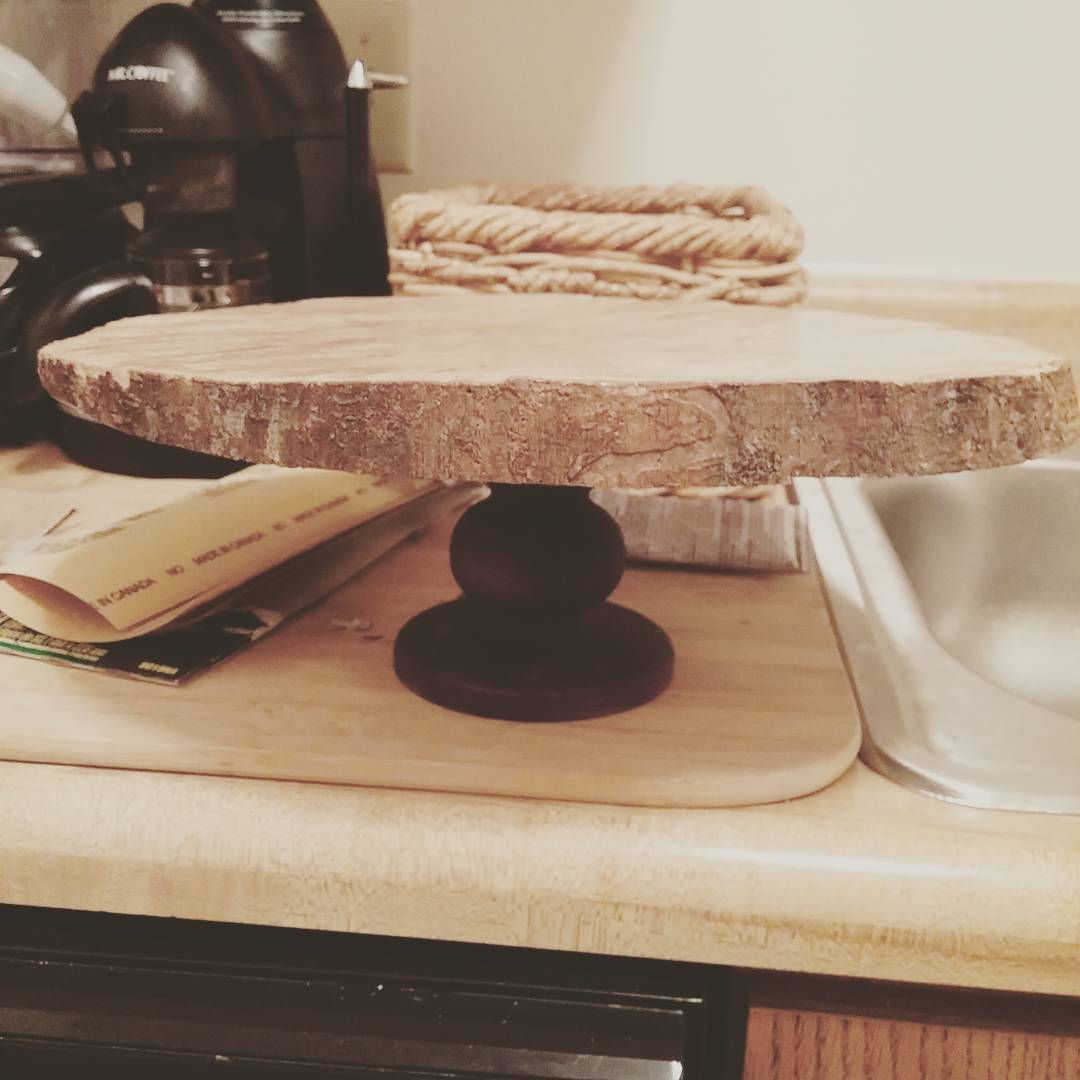
I went for a little shopping trip to my local craft store. I ventured down the aisle with all of the wood products. I've mentioned it in my rustic cake stand post that you can buy slices of wood in varying sizes and shapes.

I then picked up a jar of chalkboard paint in a color that matched my decor (which has since changed... since I made this baby months ago). You will want to put multiple layers of paint on the wood. If you don't put enough, the chalk will be difficult to erase. I used a sponge paint brush to do this, so I could have more control around the edges.

Then I screwed a picture hook to the back of the slice so that I could hang it on the wall.

Super easy, quick, and a fun piece to add to your decor.

Here is a little inspiration that I found from pinterest for your own project.

This is the one that inspired me!!

Sunday, August 9, 2015

July Wantable Fitness Edit

I'm obsessed with subscription boxes.... especially the ones where they send you clothes and then you send back whatever you don't like. I just received my Wantable Fitness box. Wantable has multiple boxes that you can select from. I'm a bit of a yoga addict, therefore I am always looking for good items to wear to yoga class. Normally I try to take pictures of all the items I receive (I'm also hooked to Instagram), but I never got around to it this time. Here are the items that I kept this month:


Let me just note that this pictures does NOT do the color of this tank justice!


Please Note: Wantable did not compensate me for this review. I pay full price for the subscription and pay the prices they offer for the products. Images came from the  manufacturer's websites.

Monday, August 3, 2015

Rustic Cake Stands

I made these pretty sweet cake stands for my friends bridal shower, and I promised you a tutorial. This was a super easy craft.


I had the wood slices cut for me awhile back. I originally intended on using them for chalkboards, but they weren't going to work for that. So, they basically sat around for close to a year waiting to be used. Many craft stores sell slices of wood that are beautiful, so you could definitely grab one of those.

Because they were actually hand cut, I needed to start my sanding them down. If you do this yourself, I would HIGHLY recommend using an electric sander. However, I used a piece of sandpaper.. and eventually gave up.

Then, I used a satin finish varnish to seal the top of the wood. I did not seal the bottom side, because I wanted to keep the rough surface. Plan on using multiple layers of varnish to give it a completely smooth finish. I'm not sure if the varnish is safe for food, so I would definitely recommend making sure you use a cardboard cake plate, and not setting the cake on the wood directly.

I found a wooden pedestal at a craft store for only about $5. I then painted it a dark purple to match the colors of the bridal shower. I have also seen these made with glass candlesticks, but I have never had much luck with gluing glass, and I wanted something I could reuse.

I then used an industrial strength adhesive made for wood to glue the pedestal to the bottom of the wood slice. I used E6000 Industrial Strength, and haven't had any issues. The glue recommends letting it sit for 72 hours before moving. I procrastinated and moved after about 12, but it had hardened enough at that point. However, I would recommend going the full 72 hours to be safe.

Super easy peasy project!! This is something that looks super unique but was extremely easy to put together. If you make your own, I would love for you to share your pictures!!